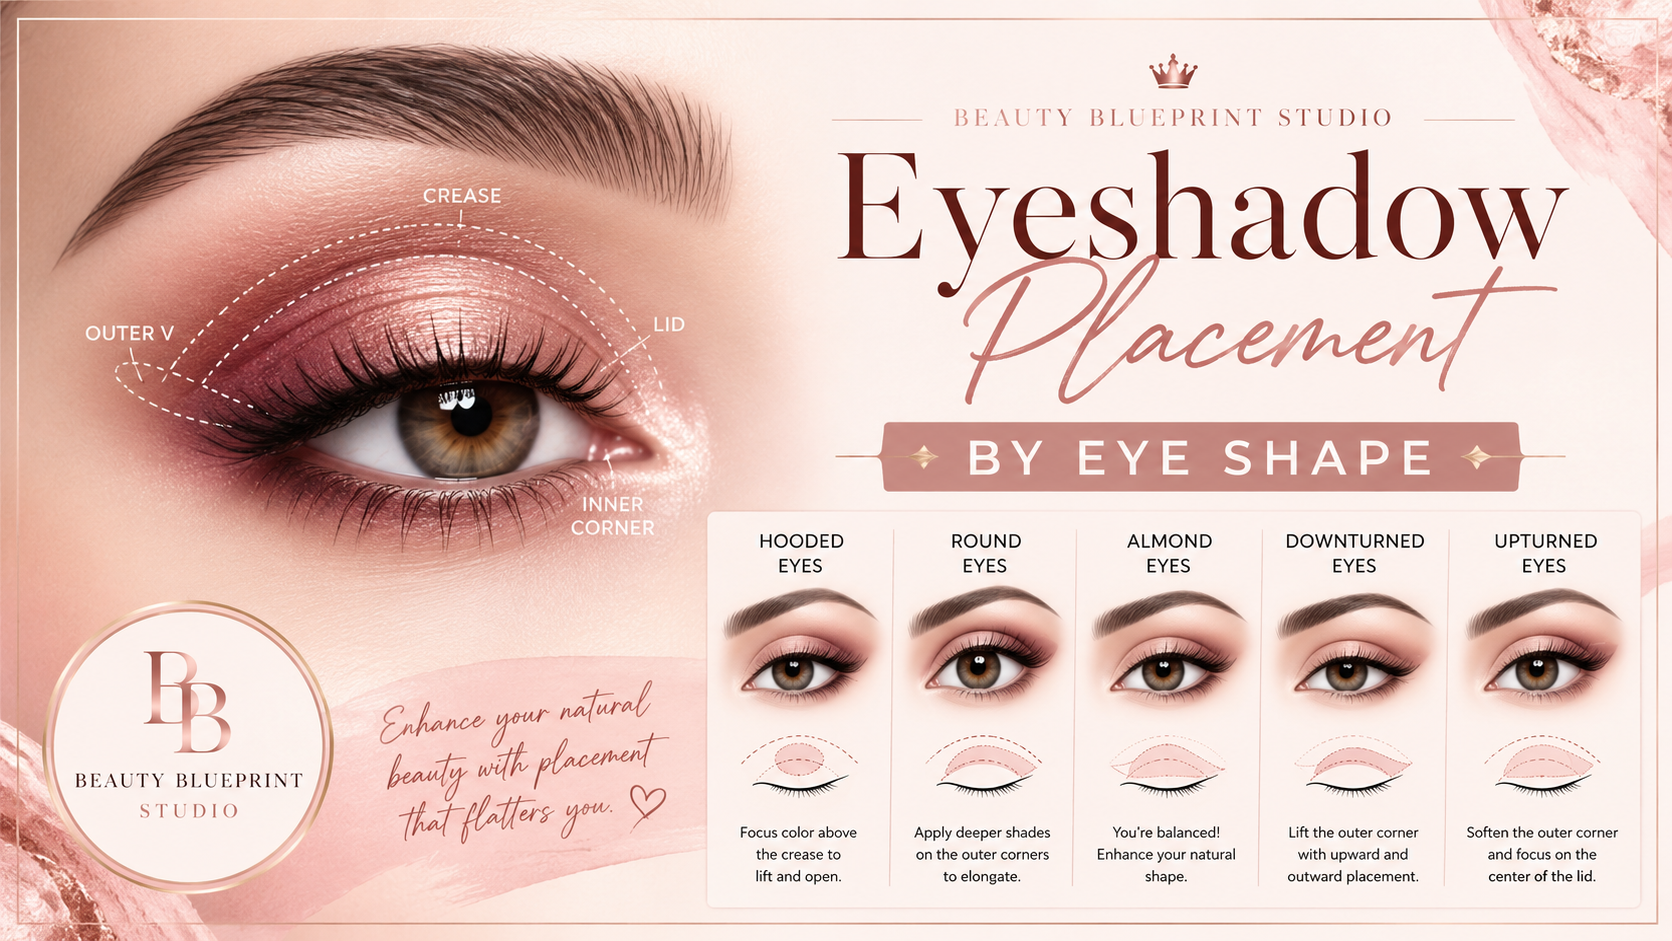
Eyeshadow Placement by Eye Shape
Eye-shape labels are useful starting points, but the most flattering eyeshadow placement depends on the lid space, crease visibility, eye angle, and the amount of depth you want to create. Use these guidelines as a flexible map rather than a rigid rule.
Start with three placement zones
- Lid: the movable area above the lashes.
- Crease: the fold or the area where you want to create the illusion of a fold.
- Outer corner: the outer third of the eye, where deeper color can add lift or definition.
Adjusting placement by visible eye shape
Hooded eyes: place the transition shade slightly above the natural crease so it remains visible with the eyes open. Keep the deepest shade on the outer third and avoid taking dark color too high near the inner eye.
Almond eyes: follow the natural shape with a soft gradient from light at the inner corner to deeper at the outer corner. A slightly elongated outer edge can emphasize the balanced shape.
Round eyes: concentrate depth on the outer third and blend outward rather than upward in a circle. This creates a more elongated effect.
Upturned eyes: keep the outer corner softly defined while balancing the lower lash line. Avoid pulling the shadow sharply upward unless a dramatic lifted look is intended.
Downturned eyes: angle the outer-corner shadow gently upward toward the tail of the brow and keep the lower outer lash line soft.
Keep the finish balanced
Use matte or satin shades for structure and reserve shimmer for the lid, inner corner, or center of the eye. Blend with the eyes open periodically so the finished placement remains visible in a natural expression.